Mywifiext Setup Steps
The mywifiext setup allows a person to set up and install all kinds of Netgear range extenders. You can also change the settings of the extender and update its firmware after accessing the mywifiext.net setup panel.
The steps mentioned below will help you understand how to access the mywifiext setup page. We are imagining that your WiFi range extender, router, and computer are turned off right now. That is why we are starting the steps to access the www.mywifiext.net setup wizard from scratch only.
- First of all, pick a network cable (RJ45 – recommended) and insert its one end into the LAN1 port of the home router and another into the Netgear extender’s WAN port.
- Thereafter, if you have a spare Ethernet cable, use it for joining the LAN port of the extender and the computer’s Ethernet port.
- You need to ensure that both connections are finger-tight. Else, mywifiext setup will fail.
- Now, it is time to switch on devices.
- Start by turning on the WiFi router, then your Netgear extender, and then the PC.
Note: If you have not connected the PC and extender using an Ethernet cable (RJ45 or similar), you should connect wirelessly to the extender’s WiFi network i.e. Netgear_ext. The default WiFi password is written on the label of your range extender. Be certain that you connect to the correct network and use the correct WiFi password.
- The next step is to load an internet browser, just like Google Chrome or Apple Safari.
- Into the address bar, input www.mywifiext.net and press the Enter key.
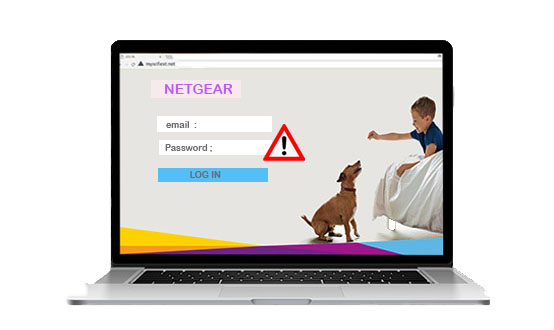
- You will soon see the login page of the extender powered by Netgear.
- There, enter admin into the Username field and password into the Password field.
- Click the Log In button.
- The www.mywifiext.net setup wizard will appear on the screen of your computer.
- Click the desired tab and change the extender’s settings the way you fancy.
This is how you can access the mywifiext setup wizard. If you are facing any problems during the process, you can contact our experts at any hour of the day.
Why is Mywifiext Not Working?
Mywifiext not working is a common error that might pop up while installing and managing a Netgear range extender. It can appear due to many reasons that have been listed below:
- You are trying to use the URL on a Mac device/ Safari browser.
- The web browser in use is not updated.
- You have not connected your PC to the Netgear extender in any way.
- Some drivers of your PC need to be updated.
- The internet connection coming from your ISP is very slow.
- You have not connected the extender and router efficiently.
- The distance between the extender and router is not appropriate.
- The incorrect web address has been used by you.
- Firewall and ad-blockers are causing the mywifiext.net not working error.
- Your Netgear extender’s location is bad.
- Connectivity issues with the network.
- IP conflict issues between the Netgear extender and other devices in the home network.
- Your web browser is cached.
- The pre-shared key and SSID are causing the error while accessing the mywifiext.net setup URL.
You must know that mywifiext.net is a local page. Therefore, it is not a big deal to fix the issue that appears while installing the Netgear extender. To learn how to deal with such a problem, you should now walk through the steps given in the next section.
Troubleshoot Mywifiext.net Not Working Error
We are now confident that you have learned all the possible reasons causing the problem related to accessing the www.mywifiext.net setup panel. Thus, you are now all set to address it in every manner. Here’s how you can get rid of the mywifiext.net not working error:
- The mywifiext.net URL is workable only on Windows PC. Therefore, if you try to use it on a Mac or any device that supports iOS, you will get the error message.
- Update the web browser you are using to access the login or setup address of the Netgear extender. Find some time to erase its cache and cookies.
- You should be well aware of the fact that no web URL functions through the search bar of the web browser. You need to use the address box to achieve success.
- Consider restoring the web browser in use to its default settings. We suggest you reset the extender if the mywifiext.net URL is still not ready to get fixed.
- The LAN cable between the Netgear extender and the main router plus that between the extender and computer must be non-damaged. It impacts the internet connection a lot.
- For better functioning of the range extender, we advise you to keep it in a ventilated location. Especially, away from devices emitting EM frequency but closer to the router.
- Try to disable the firewall and ad-blocking programs installed on your computer and web browser respectively to resolve the mywifiext.net not working error message.
- Be very sure that your extender is connected to a fit and fine wall socket. It will supply uninterrupted electricity to your range extender.
- Reboot the entire WiFi network and make another attempt to access the www.mywifiext.net setup wizard.
- Connect your computer to the Netgear_ext network in case there are fluctuations in the wired internet connection.
- Try to use another web browser to access the panel of your Netgear WiFi range extender.
Mywifiext Setup and Installation: Complete Instructions
After you finish following the above-given troubleshooting ideas, you might be successful in accessing the mywifiext setup dashboard. Therefore, if you are a new user who has given a shot to the process to complete the extender’s installation, take reference from the steps given below:
- Complete the login process using the Password – password and Username – admin.
- The New Extender Setup page will come up. Select the option with the same label.
- Accept the Terms and Conditions appearing before you.
- Now, you can set up new admin credentials for your Netgear extender.
Note: Keep the new admin password different from the WiFi network password of your Netgear extender. However, you can leave the Username as admin.
- Select two security questions from the drop-down menu and answer them.
- Agree whether you want the Netgear Genie’s help for the setup process.
- If not, then look for the 2.4 GHz and 5 GHz networks (existing ones).
- Click Next and input the WiFi password of your existing network.
- Select the SSID and password for the 2.4 GHz and 5 GHz networks (extended ones).
- Save the changes and give your extender some time to apply them.
- Now, choose a device that you want to connect to the extender’s WiFi and open WiFi settings. Thereafter, connect to the Netgear_ext.
- Your extender is now successfully set up and extending your network’s coverage.
How to Create Account | www.mywifiext.net Setup
For some extender models, you will need a mywifiext.net account if you want to complete the login process, set up your extender, and configure its settings. The steps for the same have been highlighted below:
- Fire up an internet browser on a PC connected to the Netgear_ext network.
- Be very sure that the internet connection is stable and that you are using a secure browser.
- Now, you need to visit the www.mywifiext.net setup URL or mywifiext local URL.
- The New Extender Setup page with the same button label will appear.
- Clicking the button will take you to the mywifiext.net Create Account page.
- After reaching the page, you will be asked to input the Netgear account ID and some other details.
- Input the email ID and other details, and save the changes at last.
You’ve successfully created the mywifiext.net login account. It means you have the liberty to access the extender’s settings from any device connected to your extender through Netgear_ext. Just in case you face any problems while creating the account for managing the extender’s configuration, you can talk to our experts without wasting a minute.
How to Fix Mywifiext Local Server Error?
Users often get errors while completing the setup process through their Mac devices. If you are also a Mac user who is facing issues while setting up or managing the Netgear extender using the mywifiext.local URL, you can use this section to resolve the error:
- Upgrade the OS version of your Mac device.
- Change the device’s time. It must be in sync with the internet time.
- There needs to be a firm connection between the Netgear extender and the main router.
- You should enter the mywifiext local address into the web address bar.
- There need to be no typos in the web address entry.
- Install the latest version of the internet browser.
- Temporarily disable the antivirus system on your PC.
- Lastly, be very sure that you are not using the web address on a Windows PC.
This is how you can get rid of the mywifiext local server error. We expect that after that, you will not struggle with problems related to your Netgear extender.
How to Change Netgear_ext WiFi Password?
Usually, people change the WiFi password of the Netgear extenders during the setup process only. But, there are some users who avoid doing so. If you are also among them, you are suggested to follow the steps given below to change the WiFi password or the Netgear_ext password:
- Switch on your Netgear extender and let its LED lights stabilize.
- Now, connect your PC or mobile device to the extender’s WiFi network.
- Once done, open a web browser of your preference.
- You have to visit www.mywifiext.net setup URL now.
- Complete the login process using the valid user ID and password.
- The dashboard or the Status page of your Netgear extender will show up.
- Find the Wireless Settings tab and click it.
- You will see the 2.4 GHz and 5 GHz sections.
- Navigate to the corresponding wireless frequency section and enter the Netgear_ext password into the given field.
- Save the final changes.
In this way, you can change the wireless network password of your Netgear extender. You will need to connect your WiFi clients like mobile, laptop, or computer to the extender’s network once again since the WiFi password has been changed. To reconnect to the network, you are supposed to make use of the newly assigned WiFi password to your Netgear range extender.
Common Issues During Mywifiext Setup and Solutions
Here is the list of common issues that you are likely to come across while you are in the process of setting up the Netgear extender:
| Issues | Solutions |
|---|---|
| Extender lights stay off | Ensure a stable power supply |
| Netgear extender not accepting mywifiext setup password | Use the correct password for your extender i.e. password |
| The WiFi range extender keeps rebooting | Connect the extender to a well-working power outlet |
| Range extender not connecting to router | Input the router’s correct password |
| Mywifiext.net not working | Use the correct URL as per the OS |
| Extender not detecting router | Reduce the extender-router gap |
| Netgear extender not getting the IP address | Reboot the Netgear WiFi range extender and retry |
| Can’t change extender’s SSID and WiFi password | Disable the One-WiFi Name function of the extender |
| Netgear extender not connecting to the internet | Use an intact Ethernet cable to connect extender and router |
| Mywifiext.net setup failed | Reset the extender |
How to Reset Netgear Extender?
Resetting of extender is recommended when the extender setup fails or your home network falls victim to a serious problem. Therefore, you can take the help of the steps given below:
- Disconnect your extender from the WiFi router and other devices.
- Now, grab a pin or a paper clip.
- Find the Reset hole on your Netgear WiFi extender now.
- Insert the pin into the hole and press the button present there.
- Keep the button pressed for 10 to 15 seconds.
- Very soon, your extender will start operating on the default settings.
- You can restart the setup process of your extender now.
www.mywifiext.net Setup – Frequently Asked Questions
1. What is the default Netgear extender password?
The default password of the Netgear extender is password. This value is mentioned on the product’s label as well as inside the Netgear WiFi extender manual. The admin password of the Netgear extender is case-sensitive.
2. Why am I getting the “You are not connected to the extender’s network” error?
This is because there is no connection between the WiFi network of your Netgear extender and the computer. So, you are either suggested to connect them wirelessly through Netgear_ext or using an Ethernet cable.
3. Why is my Netgear extender not accepting the router’s password?
Perhaps, you are using the router’s administrative password. You need to use the router’s WiFi password in order to complete the mywifiext setup process and extend the network successfully.
4. How to set up Netgear extender using mywifiext local?
The steps to set up the Netgear range extender through the mywifiext.local address is as same as that through the www.mywifiext.net setup URL. The only difference is that you need to use a Mac device instead of a Windows PC or laptop.
5. What should be the distance between my Netgear extender and router?
Your extender and router should be placed in such a way that their WiFi signals neither clash nor struggle to communicate. Ideally, this value ranges from 8 to 10 ft. However, you have to reduce this distance in the case of physical impedance.
6. Can I reset my Netgear extender using mywifiext.net URL?
Yes, you can reset the Netgear range extender by accessing the web-based management panel. For this, you are supposed to access the Backup and Restore settings of the extender and click the Reset button.