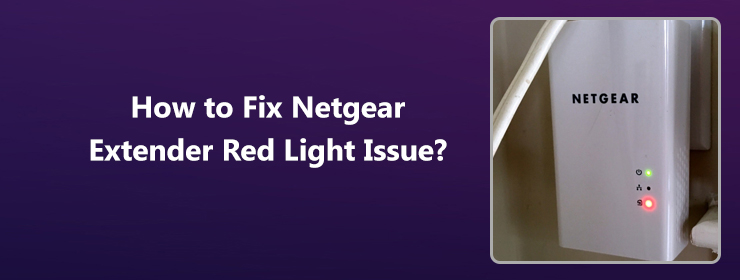
Did you notice that your Netgear extender’s light is blinking red? Are you looking for a way to resolve it, then read this guide to get a solution to troubleshoot this issue.
Reasons for Netgear Extender Blinking Red
Various reasons might cause the extender’s light to blink red and cause some connectivity issues. Below are some of those issues.
- The Netgear extender isn’t placed correctly.
- If multiple devices are connected to the router simultaneously, the extender might find it difficult to connect to the router and then show a red light error.
- Improper configuration of the extender.
- If the network connection is lost or if there is a power cut in your home, then the extender’s light might blink red.
- Extender’s Wi-Fi signals are interfered by metal objects, reflexive surfaces, or electrical appliances.
- If your Netgear Extender’s firmware is outdated, this is also one reason for the extender’s light to blink red. It is always recommended to keep the firmware updated for the smooth use of the internet.
- If any changes are done via mywifiext local while setting up the extender.
These were some of the reasons for the red light issue, let’s look at how to resolve this issue using the basic and advanced troubleshooting techniques.
Solution for solving Netgear Extender’s Red Light Error
Even if you are unaware of the Netgear extender setup, here are some tips that can help you to resolve this issue. If you face any difficulty, you can contact our technical expert to help you in resolving it.
Basic Troubleshooting Tips
- Check where the extender is placed. If it’s placed in an area where the signals can get interrupted, then reallocate it where there is no interference of any objects.
- Check the socket in which you are plugging the extender. If it is damaged, then plug the extender into another socket.
- Ensure that the extender is kept at a certain distance from metallic objects, reflexive surfaces, and electrical appliances.
- If the extender’s firmware is outdated, then update it.
- Ensure that the extender is getting a continuous power supply from the electrical socket through which it is connected.
- Power off the extender and then restart it and check the connectivity.
Advanced Troubleshooting Tips
Are you still facing the same red light error, even after following the above tips? Don’t worry, you can try these advanced tips and get it resolved.
Check your Extender’s Settings
The extender’s technical settings should be compatible with the Wi-Fi router and the device using the Wi-Fi. If you think that they are not compatible, then you can change them using the below settings.
- Turn on the extender.
- If the extender and the router that you are using have different Wi-Fi names, you can log in to mywifiext.net. If they have a different Wi-Fi name, you can type 192.168.1.250 in your browser’s address bar to log in to the setup page.
- After logging in check if SSID, 2.4GHz, and 5GHz options are disabled, and if so, then enable them.
Enable FastLane Technology
Degrading performance of the extender can also cause the red light error. So, to avoid this, you will have to enable the FastLane Technology on your Netgear Extender to enhance the extender’s performance. Here are the steps to enable this technology.
- Turn on the wireless range extender.
- After logging in to the setup page, go to the ‘Advanced Settings.’
- Click on the button labeled as ‘FastLane.’
- Select the bandwidth you want to allocate to the ‘device to extender’ and ‘router to the extender.’
- Save all the changes.
Now, you might have resolved the red light error. If you are still facing the issue, you can contact our technical expert to help you resolve the issue.