www.mywifiext.net
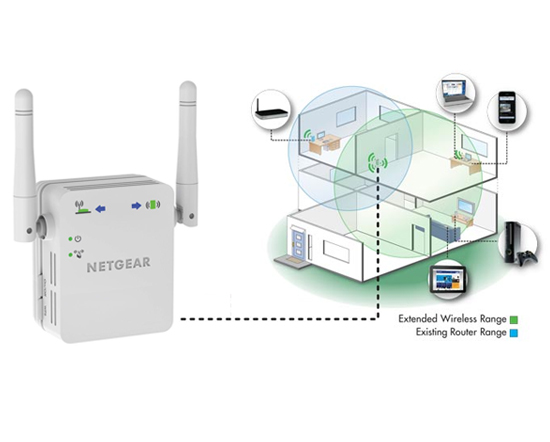
Boost the existing WiFi coverage for smartphones, tablets, game consoles and more with a simple mywifiext setup. Range Extenders help in eliminating the dead spots and work with your existing WiFi devices. Installation is also very easy – use either the www.mywifiext.net smart wizard or the configuration CD for initial WiFi extender setup.
Here’s how to setup Netgear extender Manually using mywifiext.net:
- After unboxing, plug in the extender to a power socket and turn it on.
- Connect the extender to your router.
- Directly launch an internet browser and visit www.mywifiext.net web-based address.
- Now, mywifiext.net login page will launch. Enter the username and password.
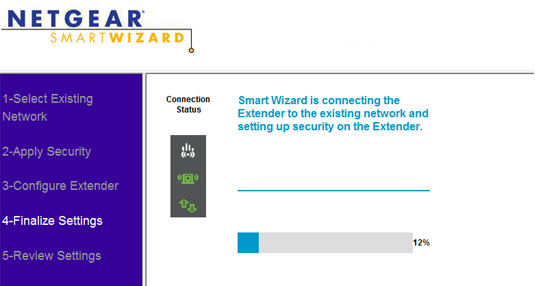
- Wait for the scanning process of your Netgear range extender to complete.
- Make a choice from the list of available networks and click continue.
- Type the password when prompted. After that, click on the continue button.
- There is also an option to change the SSID or network name.
- Thereafter, enter the security settings and make your network protected.
- Connect to your WiFi network and click continue.
- Finally, click on the finish button to complete the installation and setup of Netgear extender.
Note: The above-mentioned steps can also be used for EX6150, EX6100, EX7000, EX6200, EX3920, EX3700, WN3500R, WN2500RP, WN3000RP, WN2000RPT, EX2700, WN1000RP Netgear Range Extender Setup. For Mac Netgear Extender Setup, please refer to the next upcoming section.
Mywifiext.local
mywifiext.local is used to set up a Netgear WiFi range extender with MAC devices.
Here are the complete steps to New Extender Setup with MAC devices-
- Unbox Netgear WiFi Extender and plug into an Electrical Socket.
- Once it turns ON, wait for the green power LED to get stable.
- For new extender setup, make sure both router and WiFi Extender are in the same room.
- Connect Netgear WiFi Extender with your router.
- Open a Safari browser (MAC) and type mywifiext.local in the address bar.
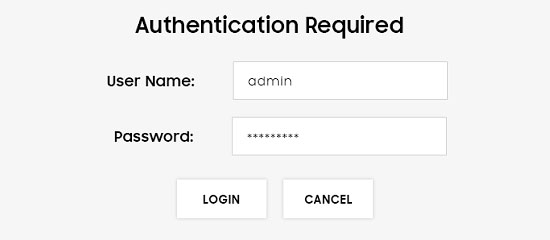
- Type username and password and hit the enter key.
- Follow the instructions over the screen to complete mywifiext.local login process.
- Once you complete all the mywifiext setup instructions and norms, click on the Save button.
- Turn OFF your router and extender for some time. Afterward, switch on the router first and then Netgear WiFi Extender and keep them withi/n in the distance of 1 meter to get sync well.
- After that, you can place your Netgear WiFi Extender anywhere within the reach of your Router to extend your network range.
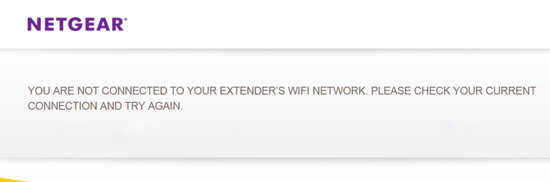
Mywifiext local doesn’t Open?
With the above-mentioned steps, you have got all the guidelines to setup Netgear WiFi Extender with mywifiext.net or mywifiext.local. But sometimes the main problem during Netgear New Extender Setup occurs is that mywifiext local doesn’t open.
The web browser keeps on showing error messages. This issue can be fixed by removing the cache and temporary files from your web browser. Also, make sure to enter the correct web address i.e. mywifiext.local (for MAC) and https://www.mywifiext.net (for Windows) in the address bar. However, if you are still facing the same issue, don’t hesitate to contact our experts at Toll-free.
In such a scenario, make sure that you have connected the extender to router correctly and you are using the correct mywifiext password. If you are sure that you have entered the correct mywifiext.net password and still facing the same issue, then you need to contact our knowledgeable technicians at toll-free .
They will provide you with extensive troubleshooting tips for fixing such kind of issues. With the help of our technical support experts, you can also reset your Netgear WiFi Extender and re-login to the extender with Genie setup.
Mywifiext.net Setup
Firstly, you should know about mywifiext.net setup as it is the main page where you can create a new account, register your device and log in to make your extender up and running.
Here are some different ways to access the admin page of your extender:
- Mywifiext.net
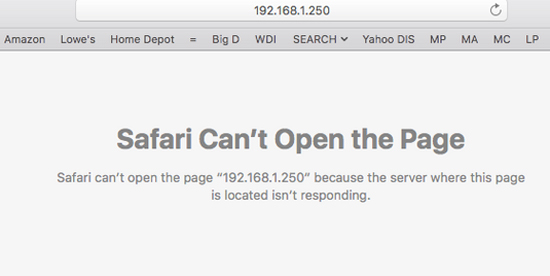
- 192.168.1.250
- www.mywifiext.com
- Mywifiext local – for iOS users
However, most users face issues while getting to mywifiext.net smart wizard. Let’s have a look at these problems:
- Server not found
- IP conflict issues
- The page can’t be found
- Can’t connect to the internet
- Not able to show the web page
- Showing error 403 or error 404
Mywifiext net Login Steps
Mywifiext net opens the Genie setup page which provides on-screen steps to set up the extender manually on MAC or Windows. For this purpose, there is a need to access the mywifiext local login page. Follow the steps mentioned below to log in to mywifiext:
- Plug the Netgear WiFi Extender into a power socket.
- Turn on a computer or laptop.
- Launch an internet browser and type mywifiext.net in the address bar.
- Once done, press Enter key.
- A login page will appear which requires you to enter the username and password.
- Enter the details and hit the login button
- This will open the mywifext.net setup page.
Now, you can modify technical settings of WiFi range extender through Genie setup page. These technical settings are quite hard to understand for a non-tech individual. So, it’s recommended to take help from our professionals via dialing our toll-free.
Can’t Access www.mywifiext.net?
While accessing www.mywifiext.net smart wizard web page, users often see error messages such as “Unable to find the Server” or “This web page cannot be reached”. Different error messages can be seen depending on the web browser. In order to get rid of this problem, go through the instructions given below:
- Reboot the extender once.
- Use another web browser.
- Reset the internet browser you use.
- Re-check the URL you have entered.
- Make sure the extender is turned ON.
- The extender should get a proper power supply.
- Make use of the latest firmware version of the extender.
- Ensure you entered the correct username and password.
- Clear the history, cache, and cookies from the web browser.
- Check if Ethernet wire has cuts in it or not. If it has, replace it with a new one.
Note: You can consider the aforementioned troubleshooting steps for Netgear EX2700, Netgear EX7000, Netgear EX6200, Netgear EX6100, Netgear EX2700, Netgear N300, Netgear EX6110, and Netgear EX3110.
With each passing day, we receive a number of customer inquiries regarding how to setup Netgear extender with mywifiext.net. Our technical team leaves no stone unturned to understand your concern and offer you the complete assistance to install and configure your extender and other networking gadgets.
There are also some users who experience problems with mywifiext.net EX6100 setup. The main reason behind this is the instability to access the default Netgear extender login portal. This web page is essential to get to the admin panel to set up your extender.
In addition, a bunch of users even come across connection problems after Netgear extender setup. They can’t connect their WiFi-enabled gadgets e.g. computer, laptop, mobile device, iPhone, iPad, TV, and a lot more. This issue appears because of various technical problems.